Showing posts with label craft. Show all posts

Craft Stores in Grenada


When I heard that there were a few craft stores in St. George's (Grenada's capital and "downtown" area), I was super excited to check them out with a few of my friends and fellow crafters here! Here's a little tour for you. :)

 Our guide, the lovely Marieke! 


They have a few fabric stores here that remind me a lot of the ones found in LA's fashion district. Bolts and bolts of fabric line the walls in a multitude of colors and fabrics. They didn't really have any cotton prints (like you'd use for quilt-making or crafts) that I saw. But they did have a nice assortment of vintage buttons. Oh, and bananas. :P 


And here is THE craft store of Grenada. The entrance is this unsuspecting doorway on the left, and the craft store is located right above a doctor's office. The store itself is pretty tiny - probably about 10' x 15' total. And with the counter taking up about half the width, and shelves lining the opposite side, there leaves about 4' x 12' of walking space. It was kinda squished with six of us in there. :) 

Honestly, I was pretty disappointed with the selection I found. They had a random assortment of curling ribbon, tissue paper, streamers, yarn, felt, embroidery floss, and a few odds and ends here and there. They did have nice assortment of spray paint, which might come in handy some day. But overall, the quality of the products were akin to those that you'd find in a dollar store back home. And because all these items are probably imported from the US, their prices are easily five times what you'd pay for them at home. I decided to pass on the craft items and work instead on creating projects with local materials and recycled items. And I will definitely bring more craft supplies with me next time! 

on the reggae buses headed back


Read more...

Must-have Crafting Tools Countdown #1

If you've been following this Must-have Crafting Tools series since I started with #10 way back when, thanks so much for sticking with me! (And for those of you just tuning in, catch the whole countdown here.) We've finally made it to #1. Are you ready for it? 

Drumroll, please!


#1 - The perfect black pen

Admittedly, I haven't found it yet. It's almost like the perfect, yet elusive, little black dress: it makes you look great all the time, it goes with anything, can be worn anywhere, and never goes out of style.

The black pen is the perfect complement to your pocket sketchbook. Because writing and sketching in pen is, for the most part, permanent, it forces you to spend more time thinking about each word, each stroke that hits the page. Instead of hastily taking five tries to draw a single line that eventually ends up looking more like a haystack, you draw one with precision. Using a black pen to draw and write forces you to be deliberate and intentional. It doesn't mean that you can't make mistakes or cross things out, but it does mean that you're not just slopping lines and words onto a page and thinking that you can always erase them later.

All designers, essentially, are problem-solvers. And problem-solving involves a lot of thinking and sketching. As awesome as computers/tablets are for working out design problems, nothing can ever replace pen and paper. The design process is one that often requires several iterations of the each idea with subtle changes here and there. If you take just a few extra seconds before each stroke, it can ultimately lead to more productive and timely sketching sessions (not to mention, saves paper!).

My sister and I often find ourselves talking and sharing about our creative processes a lot. As a writer, she works through a lot of her own creative problems the same way that I do - with pen and paper. And we've found that as different as writing and design might appear, they both require creativity, thoughtfulness, patience, hard work, and a touch of inspiration. And at the core of all that, lies the artist's black pen - her "paintbrush," so to speak.  I love having a sister who is a writer and not only shares in my love for beautiful and creative things, but who also shares in my quest for the perfect black pen!

I wish I could tell you that we found it. But like I said earlier, it's elusive and tricky to hunt down. I had these great pens once that I used to get at the drafting store that had tips that were almost like little tiny paintbrushes. I honestly believe that they actually improved my writing and sketching. But within a month, the tips would wear down and you'd have to start writing at awkward angles to get the ink flowing. I abandoned those eventually, but I still think about them every now and then.

Let me show you what I'm using for now.

This is the Uni-ball Signo UM-100 Gel Ink Pen in 0.5 mm (my sister prefers the Uni-Ball Signo RT UM-138 Gel Ink Pen in 0.38 mm). I buy these at the Japanese bookstore in Matsuwa Marketplace in Costa Mesa, CA. I actually go there for the ramen but always end up leaving with a couple of these pens too. I like that the ink has a nice flow to it, the tip is relatively fine, and that they're so cheap. I think I pay about $1.39 for each, so I always buy at least two. I throw one in each of my purses and leave a couple on my desk as well. I recently let Dean use one for note-taking, and now he claims that they're his perfect black pen. :P 

Read more...

Must-have Crafting Tools Countdown #2


#2 - Pocket sketchbook

This is another one of those items that has stayed with me from my college architecture days. My studio professors always told us to keep a sketchbook on us at all times. They'd say, "You never know when inspiration might strike!" And then they'd tell us these stories about fabulous buildings being born out of crumpled napkin sketches. These days, I use my sketchbook for jotting down things like bus schedules and grocery lists more than I use it to sketch out floor plans. In fact, I have to admit that my iPhone has replaced my sketchbook many times for list-making, but nothing beats paper and pencil when you're trying to sketch out a quick diagram or map.

I'll often use my sketchbook when I'm working on a project, particularly at the craft store. I'm a very visual person, so it helps a lot for me to actually draw out and diagram how much fabric or basswood I might need for a particular project. When I'm a the beginning stages of a design for wedding invitations or any design project, I'll always grab my sketchbook and sketch out a few preliminary ideas first. I'll take whatever sketches look like they have the most promise, and then flesh those out a bit more with a few additional sketches. Finally, I'll either scan in the sketch or work off of the sketch to create a digital version in Illustrator.

My favorite sketchbook to use is the Moleskine Classic Plain Pocket Notebook. These do tend to be a bit pricey, so I try to get them whenever I find them on sale (which isn't very often). Otherwise, I'll just find any small, sturdy, un-ruled notebook and throw that into my purse. I've used ruled and gridded notebooks before (and I know my sister really loves the gridded Claire Fontaine ones), but I feel like more often than not, I'm wanting to sketch out visuals that work best on blank pages.

So whether it's ruled, non-ruled, gridded, pocket-sized, leather, soft-cover, or lime green, there's a notebook out there for everybody!

Read more...

DIY Crepe Paper Hair Flowers


I wanted to make some simple flowers for guests to put in their hair for Hoi's tropical bridal shower, so I put together a little tutorial for you to follow along. All you need are crepe streamers, some wire, and floral tape. I attached some alligator clips to mine for easy clipping, but you can always leave them off of your flower. The flower could be attached to a gift, pinned to your lapel, or used for party decorations!


Supplies:
streamers
floral tape
scissors
alligator clip (optional)


Step 1: Cut a length of wire about  8"-10" long. Cut two small rectangles of crepe paper from the color that you wish to be on the inside.


Step 2: Scrunch up the middle of one rectangle and fold the wire in half over the middle of the scrunched rectangle.


Step 3: Twist the wire a few times to secure the crepe paper in place. Twist and squeeze the crepe paper to make a tight bunch. Snip off about half of it. Then take your other crepe rectangle and wrap it over the tip of the wired crepe paper. Twist and squeeze it tightly.


Step 4: Cut off about 20" of your second streamer color and continue folding it in halves until you have a little bundle about 2" wide. Carefully cut along the top edge to make a petal shape. Unroll the crepe paper.


Step 5: Carefully wrap the petals around the center wire, scrunching the bottoms as you go along. Stop every now and then and wrap one of the wired ends around the base to secure your crepe paper in place. continue doing this until you run out of crepe paper. At the end, wrap your wire a few times around the base to fully secure. 


Step 6: Very carefully use your fingers to stretch out each petal to make it look realistic. The crepe paper has some give, so you should be able to stretch it without tearing the paper. 


Step 7: Wrap floral tape around the wired stem. Attach to a hair clip with hot glue, if you'd like. 


Step 8: Wear in your hair!

Read more...

Must-have Crafting Tools Countdown #3

#3 - Double Sided Tape

There are few things that double sided tape can't do. Since I discovered it about three years ago, it has become my go-to resource for so many of my crafting and household needs. I use it for many of my stationery projects when I need to attach two pieces of paper together (like the two pieces from Grace and Trevor's baby shower invitation), or when I wrap Christmas gifts, or when I want to quickly put up a picture on the wall. I've put together a lot of bulletin boards for the classroom using solely double-sided tape because we didn't have any functioning staplers. I even used it once to rig my printer to print on small pieces of paper that weren't quite the right size for my particular printer. I honestly think this is one of the most awesome, affordable, and accessible crafting items that I can think of. You can find it at all craft stores, office supply stores, even grocery stores. It's an easy, non-messy solution for adhering paper, and it can stick to a number of different surfaces. I love this stuff. :)

Most of the time, I will use the Permanent Double Sided Tape because I usually need it to stay fastened pretty well. Other times, Removable Double Sided Tape also works when you have items that will need to be removed later on. I've found that the removable tape doesn't adhere very well though, and I often end up using the permanent stuff instead. I've found that it's pretty permanent on paper items, but if you're sticking to a wall or furniture/plastic, it can be removed pretty easily.

I use this stuff so much, I usually buy the multi-packs with a coupon from Michaels. They do go on sale once in a while, so I'll stock up then too. I actually brought several packs with me to Grenada, in 1/2" sizes and also the 3/4" inch size too. I'm hoping to use them in some upcoming decorating projects around the house. :)  Have you found any office or household items that have turned into a favorite crafting item?

Read more...

Must-Have Crafting Tools Countdown #4


#4 - Rotary Paper Trimmer
Now I know that I just talked about using a cutting mat, cork-backed ruler, and Olfa utility knife to cut paper, but if you're making a lot of repetitive cuts (like for invitations or wedding stationery), a rotary paper trimmer is the way to go. It's not worth your time to have to find your guide lines and position your ruler each time, particularly if you're making the exact same cuts each time too. 

Let me first introduce you to the past few paper trimmers I used before I found the one that works for me:


The very first paper trimmer I used was my dad's. He had one of these guillotine-style trimmers with the handle that swings. It definitely didn't look as cool as the one up there. It's been so long, I don't think the one he has exists anymore. I just remember it was very beige. Anyway, the swinging blade kind of freaked me out and I didn't think it made cuts as accurately as I would have liked. There was also no way of sharpening the blade after it dulled. After a while, it just started eating the paper instead of cutting it. 


So when it came time to purchase my own paper trimmer, I decided I wanted one with a rotary blade. They just seem so much safer to me, and more accurate too. I headed down to my local Michaels and came home with this Making Memories paper trimmer. I was impressed with its portability, self-sharpening blade, and the magnetic ruler that you can move around. 

I ended up using this paper cutter to trim ALL of my wedding stationery - invitations, programs, thank you cards, menus, everything. I think my hand just about fell off near the end. 

This paper trimmer served me well for a few years, but in the end, I had a few major gripes about it:
  1. It was hard to see the edge where you cut. If you needed a cut at a very precise spot, it was hard to line that spot up visually with where the actual blade cut the paper. Mind you, the difference was probably a few millimeters, but sometimes precision and accuracy is necessary.
  2. I found it very hard to trim things at right angles because neither the top, bottom, nor ruler provided a straight surface for measuring from the cut line. Because it's foldable, the top and bottom plastic parts weren't completely straight. And the ruler was actually a piece of plastic glued to another strip of magnet. The glueing job wasn't great, and neither proved to be a straight enough line to make straight cuts. And when you're trying to make 90 degree cuts, after 4 not-so-perfectly-90 degree-cuts, your paper turns out looking more like a parallelogram than a rectangle. Again, the effects were minor and mostly negligible, which is why I stuck it out for so long before switching.
  3. The "self-sharpening" blade eventually gets dull and there is no way to sharpen the blade. After about two years, this paper trimmer was no longer make crisp, effortless cuts. It still works rather well, but you have to be particular about where you apply strength. 

And so after a long, solid run of three full years, I retired my Making Memories paper trimmer and finally turned to CARL. 


I was looking for a paper trimmer that was more heavy-duty than even your strongest craft-quality trimmer, but I wasn't ready to invest in an industrial-strength trimmer. I knew this time that Michaels probably wasn't the best place to look, so I did most of my research online. After extensive research, I decided on the CARL DC210 rotary trimmer. 

Some of my favorite things about it:
  1. Like the Making Memories paper trimmer, it has a magnetic slider that you can move around to help position your paper. However, because it's not foldable, the top and bottom pieces are nice and straight. The magnetic strip is also held inside a plastic case, so it sits flush on the metal surface with only the clean edges showing.
  2. It has heavy-duty blades that are also replaceable. It also comes with an extra blade when you purchase it, as well as an extra cutting mat strip that goes under the blade area. 
  3. The blade cuts right to the edge of the paper surface, making it super easy to make highly accurate cuts. Since the blade cuts to the very edge, you can easily position and gauge where your paper should go.
  4. It claims to be able to cut through 30 sheets of 20 lb paper, 1/8" foam core, and matte board, though I've never put it to the test before. 
And a few things that I wish I could change:
  1. It has a precision rail that you lift up and press down for each cut, holding the paper securely in place. This is generally a good thing, but I just find it a little bit annoying because it requires an extra step every time I need to cut something. Granted, it does help hold my paper securely in place though. 
  2. It's quite large and unwieldy. I wish someone would make a portable paper trimmer that was still designed in a way that made perfectly accurate cuts. Those two things might be mutually exclusive though. The more moving and jostling of a piece of equipment, the more likely things can become loose and misaligned. I guess I will have to make do with a stationery trimmer. :P 

I'm happy with my current CARL trimmer for now, but I can't say that I wouldn't be open to trying something new or better. 

If you're in the market for a new paper trimmer, I encourage you to do a lot of research and maybe try out a few different types before you buy one, especially because they come at quite a high premium. Let me know if you've found something that works for you!

Read more...

Must-Have Crafting Tools Countdown #6 + #5

So this countdown is actually for three items...so maybe it's be more like #6, #5.5 and #5? You really use all three simultaneously and none of them work without the other two. But it didn't seem fair to take up three whole spots...and conversely, didn't seem right to cram three items into one spot! As a compromise, I decided to take up two real spots and add in a half spot. It doesn't make sense, I know. Just play along, okay? :)


#6 - Self-healing cutting mat
A cutting mat is pretty basic for anybody that likes to do crafts or sew. It helps to protect your work surface and also has guide lines that can help you as you cut. The self-healing mat hides any cut marks or lines, so it provides a nice even surface for cutting each time. You can pick these up at any Michaels or craft/art/hobby store. Don't forget to bring a coupon! 


#5.5 - Xacto knife or Olfa utility knife
Throughout my first year of architecture school, I mostly stuck with an Xacto knife (pictured on left) and constantly became frustrated with its lack of control and its seemingly perpetually dull blades. And then at the end of my second year, one of my architecture buddies let me borrow her utility knife to do some basic cuts on paper. One cut, and I was hooked. I love that it feels strong and substantial in my hand, giving me the control I need to make firm, accurate cuts. I use my Olfa knife for 99% of my cutting needs now. My Xacto knife is used only on those occasions when I need a super fine point for cutting or for separating things like label paper. 


#5 - Stainless steel cork-backed ruler
The cork-backed ruler is another item I picked up back in my days in architecture school. It was actually one of the items listed in my supply list that I had to buy my first week. A lot of those items now sit unused in a drawer back home, but I actually use this ruler so much that I brought it with me to Grenada. If you're cutting any type of paper stock on your cutting mat with an Xacto or Olfa knife, you have to have one of these. The corked back prevents the ruler from slipping, and the steel edge gives you a crisp guide line each time. 

Each of these items work best when used in conjunction with the other two, so do try to get all three if you do a lot of cutting at home!

Read more...

Must-Have Crafting Tools Countdown #7 - Bone Folder


#7 - Bone Folder / Scoring Board


When you're working with paper a lot, particularly with invitations or greeting cards, a bone folder is a must!  It will help you fold and crease paper so perfectly, you'll wonder how you ever lived without one.  It's not entirely necessary with thinner paper stocks, like printing paper or even scrapbook paper, but when you're working with cardstock or anything thicker than 80lb, you can see a huge difference.

The way the bone folder works is that you use the point (and a ruler) to create a score mark, and then you use the smooth sides of the bone folder to help fold the page down.

I have the Martha Stewart scoring board as well, and I think it's worth the investment if you're planning on scoring in large quantities. It has pre-made indentations, so you just line up your paper and it can score super straight lines without a ruler.

source
After playing around with the bone folder/scoring board, I've developed a method that I think works best for me. See if you can tell the difference between the different methods:

 1. No scoring. Folding by hand.

2. Score with bone folder. Fold inward.

 3. Score with bone folder.  Fold outward.

 4. Score with bone folder and score board. Fold inward.

5. Score with bone folder and score board. Fold outward.

Personally, my method of choice is #5.  I like the look of the crisp, clean inside and the ease and convenience of the score board.  #2 is a close second, but that requires a cutting mat and a ruler. 

Read more...

Must-Have Crafting Tools Countdown #8


#8 - Sewing Machine

My mom and I got this little Kenmore Mini Ultra 3/4 Size sewing machine several years ago when it was on sale during Black Friday.  I think it must've been $50 or something ridiculous like that.  It only has 6 stitches, but honestly, I don't even use all of them!  

This little guy has been faithful all these years, helping me make things like my first quilt, stuffed fabric birdies, paper garlands, scarves, and all sorts of baby stuff.

A sewing machine is perfect for whipping up handmade gifts in a few hours' time, especially when you're working with felt, as it requires no finished seams.  Stitching on paper is also a nice touch for homemade cards or invitations with a cozy, DIY feel.

I don't think I could live without my sewing machine....I'm still trying to convince Dean to let me take it to the Caribbean with us. :P 


Read more...

Must-Have Crafting Tools Countdown: #9

#9 - Digital Camera

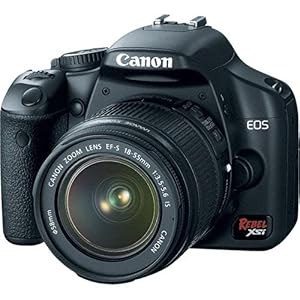
I have an awesome sister who gifted us a DSLR when we got married a couple years back, and it's one of the things that you could argue is not really a design or crafting tool, but I'm going to make a case for it.


I got my first digital camera in college when I convinced my parents that I NEEDED one for my architecture studio classes. How else was I supposed to take pictures of my intricate basswood models creating interesting shadows on the sidewalk? Really, though, I think documentation is a large component in the process of design. When you're documenting your project and looking at it through the lens of a camera, you see your project in a more objective manner. You can more clearly see all the areas in which you did well, and all the areas that needed improvement. It also helps to have a physical record of all your work once the work has been given away, tossed in the trash, or destroyed. And as you collect more work, you'll start to see your growth and development in your design style.

On the other end, a digital camera is essential in the beginning stages of a project when you're searching high and low for that perfect source of inspiration that's going to be your next big thing. Inspiration never comes when it's supposed to, so you always have to be ready to capture it immediately when you happen to come across it. A sketchbook is great, but nothing is quicker and easier than snapping a quick photo of an object that you want to keep in your inspiration bank to pull out later on.

All that being said, you definitely don't need a fancy, expensive camera to do any of this at all. Honestly, since I've gotten my iPhone, it's replaced my small digital camera that I used to keep in my purse at all times, and I hardly ever take my SLR with me anywhere anymore. I use my SLR solely for documentation and taking pics for this blog. But when I'm out and about, my iPhone serves me perfectly as a quick snap and go camera. (Btw, has anybody seen the camera on the new iPhone 4s? It's AMAZING! Plus, check out these nifty lens attachments for your camera phone!! I've been hinting to Dean about these because Christmas is coming up... :D)

Read more...

Must-Have Crafting Tools Countdown: #10

It was hard, but after sifting through all my crafting and design tools, I finally managed to whittle my must-have list down to my 10 most essential items. So I'm going to start today by talking about #10! Just as a disclaimer, I'm not being sponsored by anybody or being told to endorse these products. These are simply products and tools that I've used and loved and want to share with you.

#10 - Scanner
I have a CanoScan LiDE 110 that I got for Christmas a few years ago that I absolutely love. I feel like most scanners basically do the same job getting documents and images scanned. What sets this one apart for me is the portability and the fact that it only has one cord. All I have to do is use one simple cord to connect my scanner to my laptop and that's it. No power cord to deal with! The scanner is powered by your computer, thus making it more energy efficient too. Score. I literally store this scanner in my bookshelf. It takes up less space than my Martha Stewart Encyclopedia.


I use my Scanner a lot when I'm creating custom artwork for illustrations or when I want to use specific elements of existing artwork. For example, for Cathy and Dan's invitations, I hand-sketched the peapod, scanned it into an Illustrator file, and applied stroke effects and color digitally. It's oftentimes a lot easier to work out your ideas on paper and draw it by hand than to try working on computer solely.

Stay tuned for #9 next week!

Read more...

A Mango Birthday Party in a Box

One of my dear friends had a birthday this week, and because she lives all the way in New York, I decided to send her a birthday party in a box - a mango-themed birthday party!

The box contained everything she needed for a mango birthday extravaganza: a birthday garland, balloons, teeny tiny party hats, confetti, mango gummies and candy, mango cakes, and candles.


Hope you had a splendid birthday, Hoi! :)

Read more...
Related Posts Plugin for WordPress, Blogger...

© Rebecca Thongkham 2010


  © Blogger template Shush by Ourblogtemplates.com 2009

Back to TOP